Tuesday, November 11, 2008

How to make GREAT homemade bread (it's soft!)

I used to be scared of yeast. Honestly I would try anything in the kitchen- as long as there wasn't any yeast in it. I've overcome my fear of yeast with just a few recipes that are tried and true.

I also used to have a hatred of homemade bread. My mom made bread rather than buying it because she had nine kids and it's MUCH cheaper to make bread than buy it (especially when you buy the ingredients in bulk). Now I've come to appreciate a great loaf of homemade bread for the taste, consistency and the price! With this recipe my kids prefer homemade to store bought bread.

From making bread


From making bread


Here is my no fail bread recipe:
3 cups of hot water (about 110 degrees- but just 'hot' when you touch it)
1 Tbsp. salt
1/3 cup canola oil
1/3 cup honey
2 Tbsp dough enhancer
2 Tbsp Vital wheat gluten
5 cups of whole wheat flour
2 Tbsp instant yeast
3-6 cups white flour

A couple of items about the ingredients.
Dough Enhancer and Vital wheat gluten are what makes this bread soft. If you decide to only use white flour instead of whole wheat then you can omit these ingredients. You can generally purchase vital wheat gluten and Dough enhancer at health food stores.

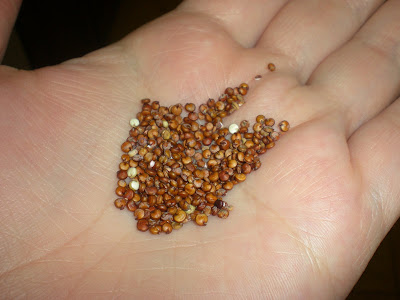
You want your wheat flour to be freshly ground. If you've got a high quality blender you can blend your wheat into flour in that.

From making bread


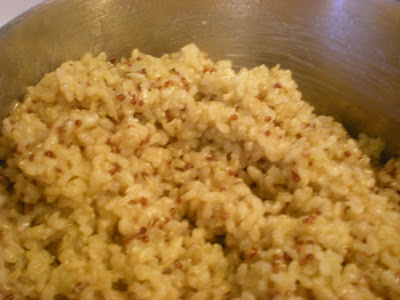
The benefits of whole wheat flour are that the whole of the wheat is present (the bran, germ and endosperm) so that there are fiber and protein that refined white flour is missing. This recipe you can add as much or as little whole wheat flour as you like- I generally do 5 cups of whole wheat to about 3-5 cups of white.

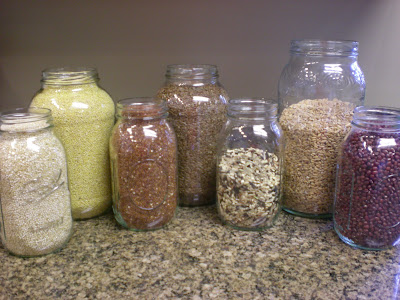
Here is my whole wheat flour in comparison to my white.
From making bread


In a mixer with a dough hook add the water, salt, oil, honey, dough enhancer, and vital wheat gluten. Then we'll add the whole wheat flour and the yeast. Begin mixing and add white flour slowly until the dough is 'cleaning the sides of the bowl.'

From making bread


On a sunny day I'll usually only add 2 1/2 cups to 3 cups of white flour, but the day that we made this is was pouring down rain outside- so there was more humidity in the air and we used almost 5 cups of white flour in this dough. It will vary- the important thing is the consistency of the dough- not the number of cups of flour. If you find that you've added too much flour you can add water a Tablespoon at a time to fix it. Dough is less finicky then you'd think.

Knead the dough until the gluten is developed, I usually knead it for about six minutes. If you're kneading by hand you'll want to knead for at least 12 minutes.

The dough will no longer be sticky and you'll see that it starts to 'stretch' a bit- that is the gluten developing that you're seeing.

From making bread


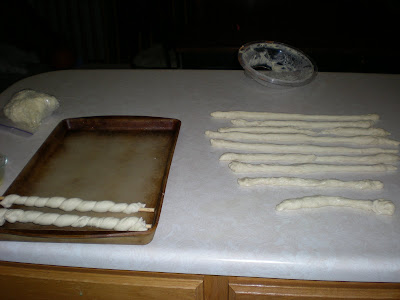
After kneading you'll immediately form it into loaves and place them in greased pans.

From making bread


Let the loaves rise in a warm place covered with a clean towel or paper towels until double in size. They will rise a bit more once you place them in the oven, but not much, so it should be about the size you want your loaf to be when it's baked.

From making bread


My middle loaf didn't quite get enough dough- and the loaf on the side got a little too much- but that's okay. Mine took about 45 minutes to rise- but it varies depending on the warmth of your house. On warm days my bread will be ready to go in the oven in 25 minutes. I generally start preheating the oven when the bread has been rising for 15 minutes.

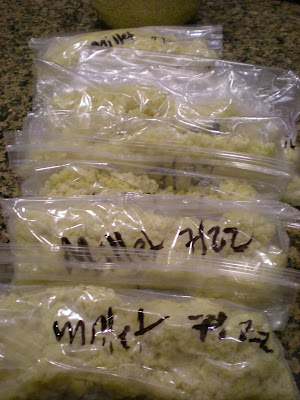
Preheat the oven to 400 degrees. When you put the bread in immediately drop the temperature to 325. This causes the bread to 'poof' up a bit more. Bake for 25 minutes or until the bread is golden and sound 'hollow' when you tap on it. Remove from oven to a cooling rack and immediately spread butter on the top of the loaf. This helps keep the crust soft. Cool 5 minutes and then remove from pan to cool completely on cooling rack. Put in plastic bag or airtight containers when cool. Extra loaves can be frozen until you're ready to use. Remember- we didn't add preservatives so a homemade loaf will mold faster than a store bought loaf!

Enjoy!

From making bread

Monday, October 13, 2008

Baked Potato Soup

So I don't know about your neck of the woods- but here it's gotten chilly fast. My family is not very soupy- generally they turn their noses up at anything that's not condensed from Campbell's. (I know!) Soup for dinner rarely goes over well. But I keep trying. After a not well attended church dinner we ended up with about 15 baked potatoes. We're not big potato eaters here either. I was recovering from surgery and just had the kids throw them in the freezer.

I made this soup with those potatoes for the second time tonight- it's so easy and so delicious I need to share.

From food, snow, garden

I got my starter recipe from YumSugar. Their picture is much better then mine. I did take some liberties though.

3 tbsp. butter
1/2 of a large onion, chopped
1 clove garlic, minced (I used a couple Tablespoons of pre-minced garlic. I like garlic)
6 baking potatoes already baked and skinned and coarsely chopped
2/3 cup all-purpose flour (about 3 oz.)
6 cups milk (use 2 percent reduced fat if you prefer- I actually mixed up some powdered milk and used it to save $$)
1 cup (4 oz.) shredded extra-sharp cheddar cheese, divided (use reduced fat if you prefer)
1 tsp. salt
1/2 tsp. freshly ground black pepper
1 cup reduced-fat sour cream
3/4 cup chopped green onions, divided
6 bacon slices, cooked and crumbled- I used pre-crumbled, pre-cooked bacon to save time
1 cup cooked millet or white quinoa (optional)
Cracked black pepper (optional)

You start off by making a roux. Once you've learned how to make a roux you never need to 'dump in can of cream of ____ soup' again. Plus it doesn't have MSG- which gives me headaches so I avoid using it.

1. Melt your butter, add the onion and garlic and cook until onions are clear. Gradually have your flour out and add it to butter- whisking as you go. When you've added all the flour (will be clumpy) gradually add milk, whisking as you go again until all the milk is added. This is your Roux.

2. Let cook, stirring as you go for about 5 minutes- then add potatoes and grain (millet or quinoa). Let simmer until it thickens (about 15 minutes) then add the bacon, sour cream and 1/2 the cheese as well as the salt.

3. Let simmer until you're ready to serve (add pepper and garlic powder to taste) then top with a dollop of sour cream, green onions and cheese.

I served ours with the easiest home made bread. Recipe coming soon for that. Great warm meal on a chilly fall or winter day.

My family actually LOVES this. Even though they're not soup eaters.

Friday, August 1, 2008

Simple ways to WoW your food

I am pretty good about sneaking veggies into stuff- but here are some ways I've added extra veggies and grains to things:

In baking I've been substituting 1/4 to 1/2 of the flour with whole wheat flour. I've also been adding a couple tablespoons of flax seed (that I've run through the blender)

To anything with ground beef I'm adding 1/2 cup of red Quinoa. I've done this to Taco Salad and Sloppy Joes this week.

Spaghetti sauce is a great place to hide grains and veggies. Even to bottled sauce you can add zuchini, carrots, quinoa, millet- just simmer and then throw in the blender when everything is soft. No one will be the wiser.

I've WoWed our homemade pizza by adding:
Crust-I substituted out two cups of whole wheat flour and added dough enhancer and Vital Wheat Gluten
Sauce- I added 10 baby carrots that I'd steamed in the microwave to soften and zucchini and then blended it in the blender.
Toppings- My newest favorite pizza toppings are: red peppers, tomatoes, onions, and thinly sliced zucchini topped with mozzerella and asiago cheese. YUM!

Have you WoWed anything?
Have your tried any recipes here?
What do you think?

It's been about three weeks.

The differences I've noticed from eating more whole grains:
1- my chronically constipated kid that nothing including laxatives seemed to help for long? She's pooping. Maybe too much info for you all- but I need to share what a huge relief this is for me! I didn't want her to rely on medication for simple bodily functions for the rest of her life. But she's only had one poopy accident in the last week. This compared to a multiple times daily thing? YAY!!!

2- I have more energy.

3- My kids don't need to snack as often.

4- I don't need to snack as often.

5- My sugar cravings that used to be out of control? WAY down.

This is huge people. HUGE!

Friday, July 25, 2008

Hi! I'm Jill the next door neighbor

Amber is just so kind! I'm really not that great of a cook but I am trying.  My story in a nutshell is that my family eats like crap I'm slowly trying to change that.  My fridge and pantry were full of processed, fatty and just not good for you foods.  With the help of a few great chefs I decided I better kick myself in the butt and start cooking healthier for the sake of all of our health and my three boys poor wives of the future.  So I will post some of the WoWed recipes that I have tried and have been a complete success for picky eaters!  The great thing about all of these grains is that they are not only full of vitamins but they don't have a whole lot of taste to them so you can pretty much hide them in anything, it's really a no brainer, why wouldn't you do it! Here are a few recipes that I'm sure you will love.


WOW Nacho Supreme

2 cups Refried Beans (pressure cook and blend)

1 cup white bean

Brown:

1 diced onion

1/2 Lb. Hamburger

1 cup red Quinoa

1 can diced tomato (blended or not)

1/2 pkg Taco seasoning

Salt to taste


Serve over tortilla chips top w/ cheese, sour cream, and lettuce


WOW Crepes


1 cup low-fat milk

3/4 cups whole wheat/spelt flour

1 large egg

1 additional egg white

1 Tablespoon sugar 


In a blender mix the milk and egg until well mixed, but stopping short of creating foam. Add flour, sugar and any spices you want to try and pulse until just mixed. The batter should be 

quite thin. Heat a lightly-greased medium skillet or crepe pan over medium head. The pan is ready when a drop of water dropped in the pan dances on the surface.


For each crepe, use 3 Tablespoons of batter. Immediately swirl the pan gently to distribute the batter in a very thin layer. Cook the crepe until the surface appears dry -- about 1 minute. 


Stack completed crepes on a plate with wax paper between each crepe to prevent sticking.


Fill crepes with you favorite filling. Roll and enjoy!


Wednesday, July 23, 2008

Lettuce Wraps

I love cooking Asian food. There are some important flavors that the majority of Asian foods require (at least at my house).

-Sesame oil
-ginger
-soy sauce and/or Teriyaki sauce
-Hosin sauce
-garlic


Lettuce wraps are pretty versatile- you can add pretty much any meat (or no meat) and whatever veggies you have on hand and as long as you chop everything about the same (small) size and season it properly they'll taste great. I feel pretty good about serving Asian food to my family since it's so full of veggies. Tonight I WoWed some chicken lettuce wraps and they got rave reviews from my toughest critics.

This is what I started with. Chicken breasts (I was in a hurry- so I used some leftover chicken from tacos two nights ago and supplemented it with frozen chicken breast pieces. Also, Yoshida sauce, a yellow and a red pepper, zucchini, green onions, thai sweet chili sauce, red pepper flakes, garlic, ginger and tonight I added leftover brown rice, millet and red quinoa. Of course lettuce for the 'wrap' part. Usually I use romaine lettuce- but I've found that really iceberg works best for these.


These are really easy to make- but the chopping does take some time. I enlisted the help of Megan (okay- she begged me) to chop the chicken. Little side note- my kids BEG to help in the kitchen. I have speed and perfection issues when it comes to cooking and really struggle with letting them help. Megan usually has chicken issues- but after chopping the chicken tonight she was so excited to eat the food she helped make. I need to 'let go' more often. She really did a good job with it though- and even used a sharp knife!

The key is to cut the veggies/meat to the same size.

I decided to add some red onion as well. Also I poured the Yoshida sauce over the cut up chicken so it would absorb some flavor before cooking (also I had to cover up the taco seasoning). I also sprinkled it with ginger. If you have fresh ginger I suggest using that- but I didn't have any so I substituted with powdered ginger.

Look how pretty it looks in the pan!


Now of course you can make these without the grains- but these whole grains will fill you up and make it so your kids aren't begging for food 20 minutes after you finish dinner. Also- they're delicious!

I started with some Sesame Oil, heated it until it was liquid- then added the garlic, veggies and stir fried them until they were tender- then I added the chicken and grains and some more ginger and Yoshida sauce. I also added Hosin sauce.

When I first started experimenting with Asian food other then stir fry (which is one of my favorites still) it took me lots of searching and finally going to a specialty grocery store to find Hosin Sauce. Now it's relatively easy to find in the Asian section of most grocery stores.

YUM!


Simply fill a lettuce leaf with some filling, roll like a taco and enjoy!


The critics say:
Ashley- "I'd give them five thumbs up if I had five thumbs!"
Megan- "These are the best! Can we have leftovers for lunch tomorrow?"
Annika (who wouldn't eat it as a wrap- but ate a couple pieces of plain lettuce and then the filling with a fork)- motioned two thumbs up.
Cori- Motioned two thumbs up- after she saw her sisters do it- but she ate three wraps.

Enjoy!

P.S. We had our wraps with cherries.

Millet- not just birdseed anymore!

Millet is our next super grain!


Millet is a super grain- meaning that it is a complete protein. In many parts of the world millet is a staple, although in America it's primarily used as bird seed. Millet is easy to digest and is gluten free. Try adding cooked millet to casseroles for extra protein- and use less meat.


To prepare millet you can simmer it 1 part millet to 2.5 parts water for about 30 minutes (until water is absorbed). It's very soft and bland- which helps it blend into most foods seamlessly.

I cooked 1 cup of millet tonight and ended up with 5 cups of cooked millet.


1 cup of millet contains 284 calories, 8 grams of protein, 2 grams of fat, 7 mg calcium, 240 mg phospohorus., 1.5 mg iron, 3 g dietary fiber as well as thiamin, riboflavin, niacin, and potassium.

Welcome!

What's better then one awesome cook? Two awesome cooks! (We're humble too).

I'd like to welcome a new blogger to What's For Dinner. After spending the last week sharing food and discussing recipes (and being impressed with her skilz) I think that my neighbor Jill will be a fabulous addition here. So welcome Jill!

Sunday, July 20, 2008

Our First SUPER GRAIN! Quinoa

Quinoa (Keen-Wah)


Quinoa comes in three colors, white, red and black. The above picture is red quinoa. Quinoa is a super grain. What is a super grain you ask? Well it's a grain that contains all 8 of the essential amino acids to make it a complete protein. Quinoa also contains lysine, which wheat does not, as well as niacin, iron and potassium.

Quinoa is prepared by simmering in water 1 part quinoa to 2 parts water (1 cup of quinoa to 2 cups of water) until water is absorbed (about 12 minutes when I did it tonight).


The texture of quinoa is much like that of al dente pasta or of brown rice. In fact tonight I added quinoa to our brown rice and it was hart to tell. The flavor is a little 'nutty' and quite pleasant. A suggestion from the WoW class was replacing 1/2 the ground beef in a recipe with red quinoa.


See the quinoa? My kids saw it too- luckily they're pretty good about eating what they're given, and I've been so excited by this class that I've been talking about it practically non-stop since I've gotten home. Luckily my next door neighbor and friend is excited to and is willing to listen to me talk about how I've been incorporating things and give me tips/hints on better ideas.

I added quinoa into our pizza sauce last night (after blending you'd not even know it was there) and my husband even added some to a chocolate shake tonight. I've also added it to spanish rice.

I paid $2.65 a lb for quinoa at the health food store. I cooked up a cup of quinoa and used some of it tonight and put the rest into snack sized ziplocs and stuck it in the freezer where it's supposed to be good for 6 months.

More about quinoa

WoW your food!


I attended a cooking class this week that's got me all fired up about eating healthy. I think on a scale of 1-10 with 1 being only eating McDonald's to 10 being only eating food that we grow organically in the season that it's grown we probably rate a 6 on the 'healthy' scale. My kids eat fairly well and I cook (generally mostly from scratch) often. We usually have a selection of veggies and fruits with meals and my kids eat them. I sneak veggies into the main dish as well.

This class I attended was fabulous. The presenters discussed ways to lessen the meat that you serve your family and adequately replace the proteins with whole grains- in ways other then in bread! They discussed grains I'd never heard of, and some I had but didn't know the health benefits of. I paid a visit to the health food store and $50 later am ready to start some experimenting.

One of the presenters shared her powerful experience with changing her diet to a higher whole grain diet and it's direct effect on her health. The power of her story is amazing and I've asked her permission in sharing it- and if she approves I will.

I've struggled with a variety of physical ailments, auto immune diseases that seem to come and go without explanation (diseases that shouldn't go once they're diagnosed). My 5 (almost 6) year-old struggles with chronic constipation. If nothing else I'm hoping a diet higher in whole grains (besides wheat) will help her bowels function properly.

I have a tendency to go through phases, to get all excited and fired up- but this is EASY. That's the key. You cook your regular recipes and WoW it in order to up the fiber and the vitamins and minerals and your family won't even know! Wherever you're at you just do a little better.

I'm going to start by discussing some grains that I'm experimenting with- and sharing recipes- the old way and what I've done to Wow it. I'm excited. Hold on tight!

Tuesday, May 20, 2008

Easy Pasta Salad

This is a great recipe for a hot summer night and you can mix and match ingredients to your families tastes. This was a hit with the whole family tonight.

Ingredients:
1 Pkg. Angel Hair Pasta
1 bottle of Zesty Italian dressing (Kraft)
meat cut into bite sized pieces (we did grilled chicken pre cooked and thawed from costco, and pepperoni)
veggies (green/red peppers, tomatoes, olives, zucchini, summer squash)
cheese if you want (we did cheddar, asiago and fresh parm tonight)

Toss all together with dressing (not the whole bottle- just enough to moisten) and serve cold.

Tuesday, May 6, 2008

Hawaiian Haystacks

This quick and easy dinner is a family favorite. My kids love it because they can choose what to put on theirs- I love it because it's fast and everyone likes it (and ends up eating more veggies then they realize).

The important thing here is options. You don't HAVE to have all of these ingredients- and when you put them on the table it's best to let people build their own.

Base:
Rice (I prefer brown- but white works well)
'crunchy noodles' (chow mein noodles)

Create your haystack with any/all of the following:
cheese
pineapple
ham
cut up chicken
polish keilbsa
celery
tomatoes
peppers (I like red ones on mine)
olives
green onions
coconut
almonds

Top with Sweet and Sour sauce

Sweet and Sour Sauce

This is a recipe that I've been using since I was about 9. We learned how to make Hawaiian Haystacks at a church activity and used this sauce. I also use it to top sweet and sour meatballs.

Sweet and Sour sauce:
mix:
1 cup brown sugar
1/2 tsp garlic
1/2 tsp ginger (I usually add more of each ginger and garlic though)
2 Tbls. cornstarch
then add:
1/2 cup apple cider vinegar (white works though)
1/3 cup pineapple juice
1/3 cup water (you can add more water and less juice or more juice less water to adjust sweetness)
2 tsp soy sauce

microwave for 4-5 minutes until thickened

Friday, February 29, 2008

Taco Salad

This is one of our favorites for a fast and easy dinner. The trick is with this to find how your family likes it best. Here is how I make it.


Saute:
1 onion
5Tbs. (ish) minced garlic (I use pre minced garlic- but you can substitute powder to taste- but add after tomatoes)
one green pepper
1lb of ground beef (I use extra lean)
This is a good place to add extra veggies and grains also. I generally add chopped zucchini and quinoa.


When veggies are cooked through and beef is browned add:
2-3 cans of tomatoes
1 can kidney beans (drained and rinsed)
1 can of corn
taco seasoning to taste
simmer until it's cooked through

Serve over lettuce and chips and top with sour cream, cheese, guacamole and olives. I like to add ketchup to mine- which my husband finds disgusting, my kids like it with ranch, which I can't stomach. I like to make mine with lettuce on the bottom and then crush just a few chips on top for crunch without adding too many calories.

Wednesday, February 20, 2008

Breadsticks (twisty style)

We ate at a pizza place several months ago that had THE BEST breadsticks. I've fiddled around with a way to copy their recipe. I use my pizza crust dough- usually I make two pizzas and then use the rest of the dough to make breadsticks.

You'll need food safe dowels- I get them in the cake decorating aisle (of a craft store or Walmart).
I start soaking the dowels in warm water when I make my dough- so they soak for at least an hour while the dough rises and I make my crusts for pizza.

Then roll out pieces of dough into long 'snakes' as my kids call them, roll out all your dough so that the first ones are 'resting' while you roll out the rest, this will make the dough easier to roll onto your sticks.

Then wind them up around the soaked sticks and lay on a cookie sheet. Brush with melted butter and either sprinkle with garlic salt and basil, or brush with butter and then roll in a cinnamon and sugar mix. (Don't sprinkle on the cinnamon and sugar- you'll end up with a burnt, smoky mess).

Here is the rolled out dough and the first couple of one's ready for the oven:
Here is a close up of the oven ready ones (before adding spices):
Here they are out of the oven :

Brush with butter as they come out of the oven while they're hot- this will keep them soft. Baking them on the sticks keeps them moist. They turn out fabulous (and eating them off the sticks is just fun).

And these are my lovely assistants/taste testers:

Tuesday, February 19, 2008

Pizza Sauce

1 can diced tomatoes
1 can tomato paste
1-2 tsp sugar

Spices to taste:
basil
garlic
salt

Mix all ingredients and heat to a low boil. Turn down and simmer until combined and the same consistency/texture throughout. You can run it through the blender for a smoother sauce.

Sunday, February 10, 2008

Pizza Crust

This is a recipe from a friend who used to own a pizza restaurant. My biggest problem with homemade pizza used to be the crust- it was always 'bready' and too often undercooked (gross!) So there are several secrets to this crust being fabulous.

Ingredients:
2 Tbsp Yeast
2 Tbsp Sugar
2.5 Cups warm water
2 tsp salt
3 Tbsp oil
5-6 cups of flour

Mix all ingredients together- kneading until flour is incorporated. Let rise overnight for the dough that's easiest to handle- or let rise on counter until double in size. But you can make the dough up on Monday and not use it for several days if you want.

Press the dough out into circles (about 10 inches works well) and then rub with olive oil and sprinkle with salt and oregano. Par bake the crust in a pan on the stove until it bubbles and is golden brown (flipping to par bake both sides). Remove from pan before it's cooked all the way through. Top with sauce, cheese and toppings and put it in the oven (preheated to 500 degrees) directly on the rack until the cheese is melted.

The par baking and high temperature baking helps to avoid the soggy crust.